Before we start, I have provided a repository that contains some example config files based on my personal preferences. If that is the only thing you are looking for, you can skip right to the conclusion section and check that out!
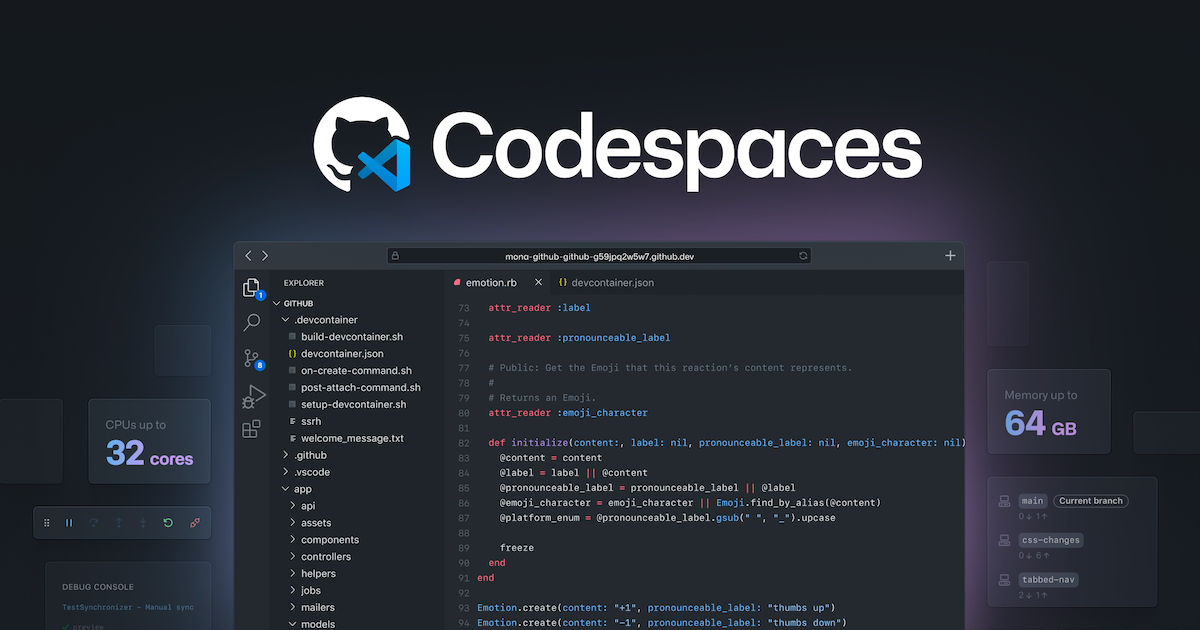
GitHub Codespaces is an online development environment that allows developers to write, review, and debug code without needing to set up a local development environment. It provides a fully configured cloud-hosted development environment that can be accessed from any device with an internet connection.
Codespaces was introduced by GitHub in 2020 as an extension of their popular code-sharing and version control platform. It was created to simplify the development process, especially for those who are new to programming or for those who don't have the resources to set up a development environment on their local machine.
One of the main benefits of Codespaces is that it eliminates the need for developers to set up their own development environment. With Codespaces, developers can create a pre-configured environment that includes their favorite tools, libraries, and extensions. This can be especially useful for teams who want to ensure that everyone is working with the same development environment and tools.
Codespaces also allows developers to collaborate in real time. Multiple people can work on the same project simultaneously, making it easier to collaborate and solve problems quickly. It also has an integrated Visual Studio Code editor, which is a popular and powerful code editor that provides developers with features such as code completion, debugging, and Git integration.
Another significant advantage of Codespaces is that it provides a high level of security. Since the development environment is hosted in the cloud, all the code and data are encrypted and protected by GitHub's enterprise-level security features. This can give developers peace of mind knowing that their code and data are safe and secure.
Using Codespaces is straightforward. To get started, a developer can create a Codespace from a repository on GitHub. They can then customize the environment to include the tools, libraries, and extensions they need. Once the environment is set up, they can start coding, reviewing code, and collaborating with others.
Overall, GitHub Codespaces is a powerful tool that can simplify the development process and improve collaboration among developers. It provides a fully configured development environment that is accessible from anywhere, making it a valuable tool for remote teams. With its ease of use, security, and collaboration features, Codespaces is an excellent option for developers looking to streamline their workflow and focus on coding.
How to use Github Codespaces?
Using Github Codespaces is relatively straightforward. Here are the steps to follow:
Sign up for a Github account:
If you don't already have a Github account, you'll need to sign up for one. Github is a code-sharing and version control platform that Codespaces is built on.
Create a repository:
Once you have a Github account, you'll need to create a repository for your project. If you already have a repository, you can skip this step.
Enable Codespaces:
After you've created a repository, you'll need to enable Codespaces. To do this, go to the "Settings" tab in your repository, and then click on "Codespaces" on the left-hand menu. Click the "Enable Codespaces" button to activate it.
Create a Codespace:
Once Codespaces is enabled, you can create a new Codespace by clicking on the "New Codespace" button in the "Codespaces" tab of your repository. You can select the type of environment you want to create, including the operating system, programming language, and tools you want to use.
Customize your Codespace:
Once your Codespace is created, you can customize it by installing any additional tools, libraries, or extensions you need. You can also configure your workspace settings, such as your font size, theme, and other preferences.
Start coding:
Once your Codespace is set up, you can start coding. You can open files, edit code, and test your applications just as you would with a local development environment.
Collaborate with others:
Github Codespaces allows you to collaborate with others in real time. You can invite other developers to your Codespace, share your screen, and work on code together.
Save your work:
As you work on your project, your changes are automatically saved to your Github repository. You can commit and push your changes just as you would with a local development environment.
Github Codespaces is a powerful tool that can simplify the development process and improve collaboration among developers. By following these simple steps, you can start using Codespaces to create a cloud-hosted development environment for your projects.
devcontainers.json file
The devcontainer.json file is a configuration file used by the Visual Studio Code Remote - Containers extension to define the development environment for a project. This file specifies the Docker image to be used as the development environment and any necessary extensions, settings, and dependencies.
The devcontainer.json file was first introduced in November 2018 as part of the Visual Studio Code Remote Development extension pack, which enables developers to use containers, SSH, or Windows Subsystem for Linux (WSL) as a development environment. The goal of this extension was to make it easier for developers to set up and manage their development environments by leveraging containerization technology.
Initially, the configuration options were limited to specifying the Docker image to be used for the development environment, along with some basic settings such as the workspace folder and user account information. However, over time, the capabilities of the devcontainer.json file have been expanded to include support for Docker Compose, port forwarding, environment variables, and more.
Today, the devcontainer.json file has become a standard way of defining development environments for Visual Studio Code projects and is widely used by developers and organizations around the world. It provides a flexible and portable way to define and share development environments across different platforms and team members, making it easier to set up and maintain consistent development environments for your projects.
You can find the schema definition of the devcontainer.json file in the Visual Studio Code documentation or in this repository. In addition, this tutorial can also help.
How to customize dev containers?
Customizing dev containers in Github Codespaces can help you tailor your development environment to your specific needs. Here are some examples of how to customize dev containers in Github Codespaces:
Add or remove software packages:
You can customize the list of software packages installed in your dev container. For example, if you're working on a Node.js project, you may want to install additional packages such as npm or yarn. You can either do this by adding the following command to the Dockerfile:
# Probably not the best way
RUN apt-get update && \
apt-get install -y npm yarn
Alternatively, you can add this line to your devcontainer.json file:
"features": {
  "ghcr.io/akhildevelops/devcontainer-features/apt:0": {
    "packages": "yarn,npm"
  }
}
Add or remove npm packages:
You can add npm packages to your dev container by using the npm-packages feature and adding the following line to your devcontainer.json file:
"features": {
  "ghcr.io/devcontainers-contrib/features/npm-package:1": {
    "package": "yarn"
  }
}
Install additional extensions:
You can customize the list of Visual Studio Code extensions that are installed in your dev container. For example, let's say you're working on a Python project and want to install additional extensions such as the Python extension for Visual Studio Code. You can do this by adding the following command to the Dockerfile:
# Probably not the best way
RUN code --install-extension ms-python.python
Alternatively, you can add this line to your devcontainer.json file:
"customizations": {
  "vscode": {
    "extensions": [
      "ms-python.python"
    ]
  }
}
Change the default shell:
You can customize the default shell that is used in your dev container. For example, if you prefer to use zsh instead of bash, you can change the default shell in your dev container. You can change the default shell in your dev container by adding the following command to the Dockerfile:
# Probably not the best way
RUN apt-get update && \
apt-get install -y zsh && \
chsh -s /bin/zsh
Alternatively, you can install the common-utils feature and add this line to your devcontainer.json file:
"features": {
  "ghcr.io/devcontainers/features/common-utils:2": {
    "installZsh": true,
    "configureZshAsDefaultShell": true,
    "installOhMyZsh": true,
    ...
  }
}
Customize Visual Studio Code settings:
You can customize the Visual Studio Code settings that are used in your dev container. For example, let's say you want to change the default font size or theme. You can customize the Visual Studio Code settings that are used in your dev container by adding the following commands to the devcontainer.json file:
"customizations": {
  "vscode": {
    "settings": {
      "editor.fontSize": 16,
      "workbench.colorTheme": "Monokai",
      ...
    }
  }
}
Port forwarding:
You can forward ports from your dev container to your local machine. For example, let's say you're working on a React project and want to forward port 3000 from your dev container to your local machine. You can do this by adding the following command to the devcontainer.json file:
{
  "forwardPorts": [3000],
  "portsAttributes": {
    "3000": {
      "label": "React App"
    }
  }
}
By customizing dev containers in Github Codespaces, you can create a development environment that is tailored to your specific needs and preferences. This can help you work more efficiently and productively, and make your development experience more enjoyable.
How to speed up the boot time?
Speeding up the boot time of Github Codespaces can help you get started with your development work faster. Here are some tips on how to speed up the boot time:
Use a smaller dev container:
Using a smaller dev container can help reduce the boot time. You can remove unnecessary packages and libraries that are not required for your project. This can be done by editing the Dockerfile in your dev container.
Use caching:
Caching can help reduce the time it takes to build your dev container. You can use the Docker layer caching mechanism to cache the results of frequently executed commands. This can be done by adding the appropriate commands to the Dockerfile.
Use the pre-built image:
If you're working with a popular programming language or framework, there may be pre-built images available that you can use. This can help reduce the boot time since the image is already built and cached.
Optimize your workspace:
You can optimize your workspace settings to improve the boot time. For example, you can disable unnecessary extensions or reduce the number of open files in your workspace.
Use the "Resume" feature:
Github Codespaces has a "Resume" feature that allows you to resume your last session. This can help reduce the boot time since you don't need to set up your development environment from scratch every time.
Limitations
While Github Codespaces offers several benefits, there are also some limitations to consider:
Limited customization:
While Github Codespaces provides a lot of preconfigured development environments, there is limited customization available. This may not be an issue for most developers, but it can be a problem for those who require specific tools or configurations.
Performance:
Github Codespaces runs on shared hardware, which means that performance can be an issue, especially for resource-intensive applications. However, the performance is generally good, and it may not be a significant issue for most use cases.
Limited offline access:
Github Codespaces is a cloud-based service, which means that you need an internet connection to access your development environment. This may not be a problem for most developers, but it can be an issue if you are working in a location with limited internet connectivity.
Limited storage:
Github Codespaces provides limited storage space for each user, which means that you may need to manage your storage carefully to avoid running out of space.
Can I use it with JetBrains IDEs or JupyterLab?
Github Codespaces can be used with JetBrains IDEs like IntelliJ IDEA, PyCharm, and WebStorm. You can set up JetBrains Gateway to connect to your Codespace and use it as a remote development environment. You can also use it with JupyterLab. You can read more about this here.
Conclusion
Github Codespaces is a powerful tool that can help you create a cloud-hosted development environment for your projects. By following these tips, you can get started with Github Codespaces and start using it to create a development environment for your projects.
In addition to the examples provided in the official documentation, you can check out some example configurations that I have created based on my personal preferences in this repository.